如何在 debian 上安装使用 tor

如何在 debian 上安装使用 tor
简介
tor的全称是the onion router,是用来保护互联网隐私的一个开源软件。
这篇文章是在debian上安装使用tor代理的过程。
使用tor的
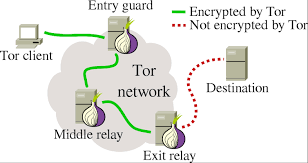
前提是能够连接到tor的relay 见下图
安装
在 debian 上安装 tor 只需要执行一条命令
1
sudo apt-get install tor
配置
编辑torrc文件
1
sudo vi /etc/torrc
找到并注释下面这行
1
#ControlPort 9051
再找到下面这行 注释并把 1 改成 0
1
#CookieAuthentication 1
重启 tor
1
sudo /etc/init.d/tor restart
测试
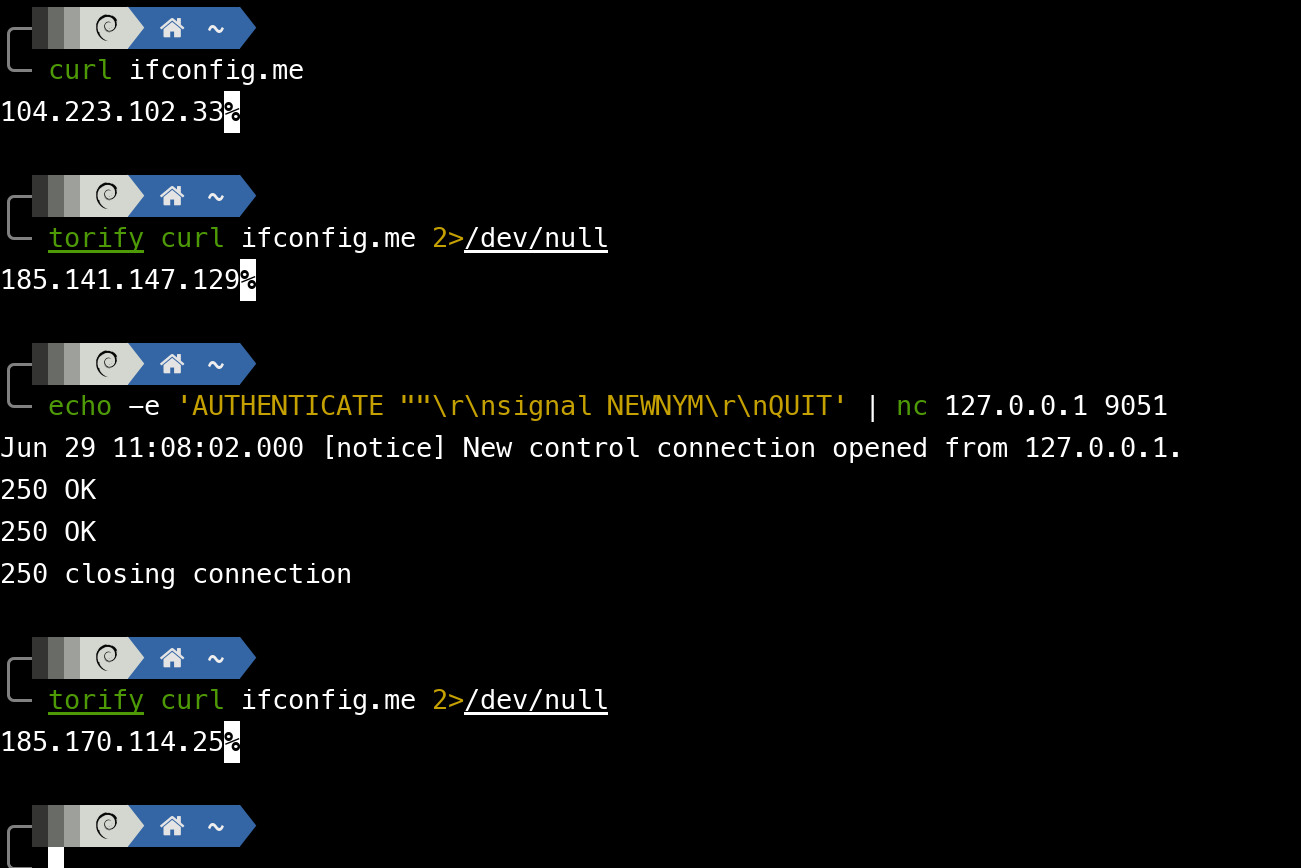
查看 真实的公网ip
1
curl ifconfig.me
查看 使用tor后的ip
1
torify curl ifconfig.me 2>/dev/null
对于这条命令:
torify=> 通过tor执行curl命令2>/dev/null=> 重定向torify产生的无关信息
获取新ip
如果连接成功,上一步中将输出不同的 ip ,那么当前 shell 的网络流量就是经过 tor circuit 代理的。
如果想更换 tor circuit ,可以执行
1
echo -e 'AUTHENTICATE ""\r\nsignal NEWNYM\r\nQUIT' | nc 127.0.0.1 9051
然后再根据 测试 中给出的步骤重新检查 ip
为firefox浏览器开启tor
编辑配置文件
torrc找到并注释1
#SocksPort 9050在火狐浏览器中找到
Network Settings开始手动设置:
SOCKS Host为127.0.0.1Port为9050使用
SOCKS v5代理选项No Proxy for为127.0.0.1勾选
Proxy DNS when using SOCKS v5最后再来测试一下,点击访问 tor测试站点
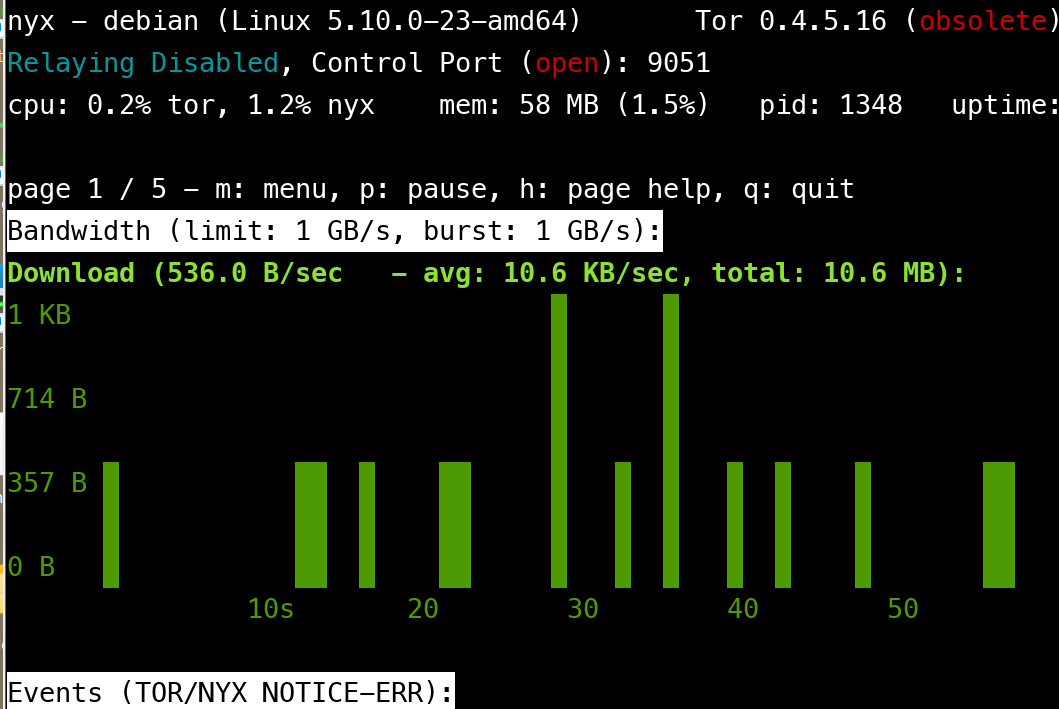
nyx图形化界面
nyx 在安装 tor 的时候默认一并安装,是一个与 tor 配合使用的流量监控界面 执行 nyx 命令即可打开 nyx
参考链接
在使用Tor时请遵守当地法律法规
This post is licensed under CC BY 4.0 by the author.